Select`n Action is a feature in Geelus that enables bulk processing of orders or transactions. It allows you to select multiple transactions in a list and apply an action to them, such as setting their location in a racking system or marking them as done/paid/collected. This feature is designed to help you process a large number of orders quickly and hassle-free. This article will explain the usage of the Select’n action feature for Racking.
In order to use racking, first we need to setup an extra field to be able to set rack numbers. Here is the guide on how to set it up:
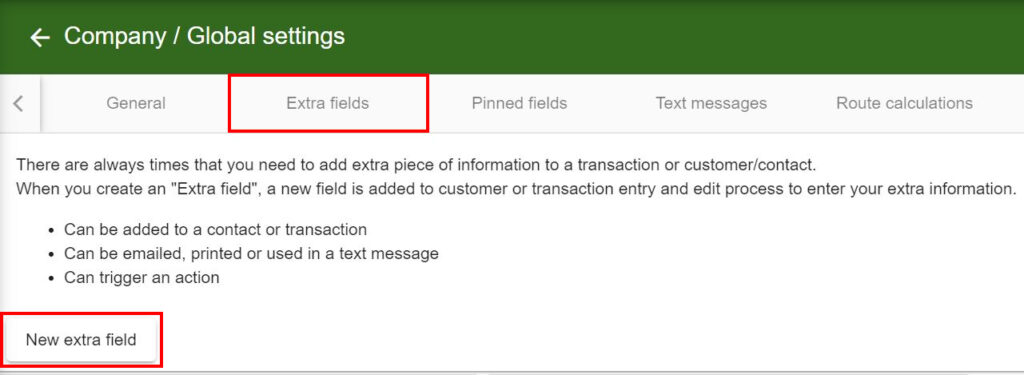
- Navigate to Settings > Company/Global settings
- Click on the “Extra Fields” tab
- Click on the “New extra field” button
- Enter the necessary fields:
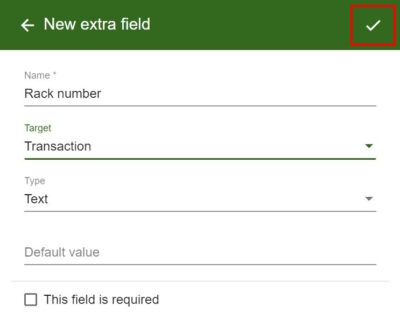
- Click the checkmark to save the extra field
- Then, click “Yes, add now” on the popup to add to register.

Now, we have the racking system setup. Let’s take a look at how we can use Select’n action to rack orders.
- Navigate to “Transaction history”
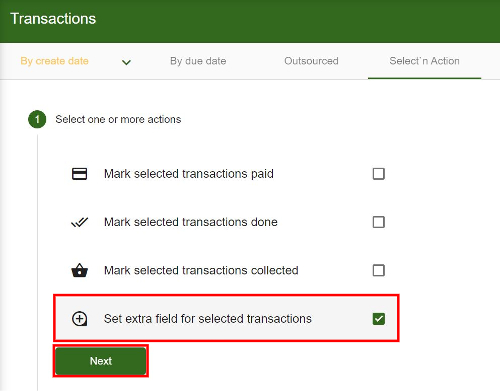
- Click on the “Select’n Action” tab
- Step 1: Check the “Set extra field for selected transactions” box and click the “Next” button
- Step 2: Choose the extra field we created previously (Rack number) and select the option “Set individually on each transaction” if we want to set a different rack number for each order otherwise, choose “Pre-set extra field” if we want to set the same rack number for multiple orders, and then click next.

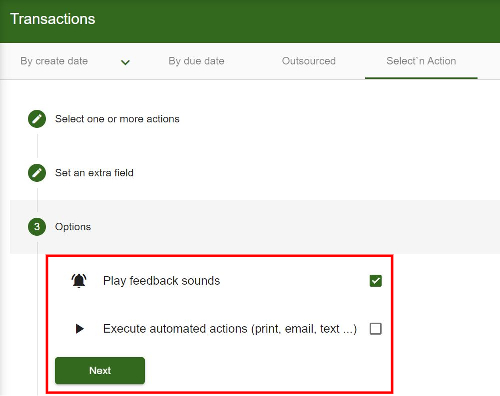
- Step 3: Choose options whether you want to play feedback sounds or execute automated action upon setting a rack number.
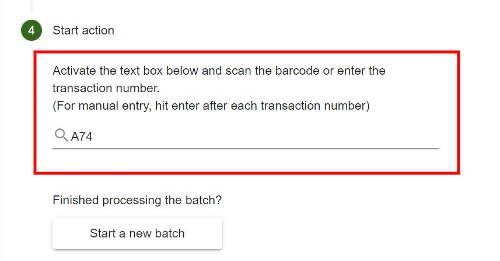
Now we can start racking our orders. If you have a barcode scanner, you can use it to scan order numbers for faster racking. For demonstration purposes, we have an order “A74”, and we would like to set rack number “102”. Here is how we can do it:
- Click on the “Search or scan” field.
- If you have a barcode scanner then scan the barcode on the receipt if not, manually type the order number “A74” and press the “Enter” key on your keyboard.
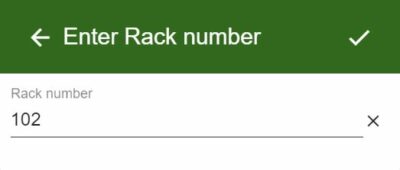
- Enter the rack location “102” on the popup box, and press the “Enter” key again or click checkmark.
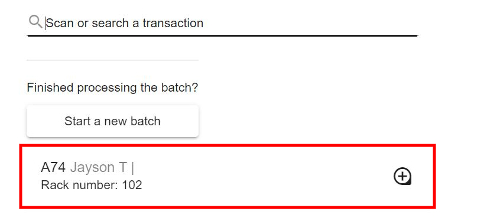
- The rack number is successfully set to this order and if you have more orders to rack, you can continue scanning or typing the next order numbers and repeat the process until finished.


