One of the most popular email marketing services is MailChimp. It is an online platform that sends email invitation and reminders to your clients. This is a great tool to send multiple emails. Integrating Geelus with Mailchimp can be beneficial for businesses because it allows them to automatically sync customer data from Geelus to MailChimp, enabling them to easily create targeted email marketing campaigns to their customers.
In this article, we’ll show you how to integrate Geelus with MailChimp.

Integrating Geelus with MailChimp requires the following:
Once you have set up the integration, every time a new customer is added to Geelus, their information will be automatically added to your MailChimp list, allowing you to market to them through email campaigns.
Creating a New Form in MailChimp
Follow these steps to create a new form and generate a URL.
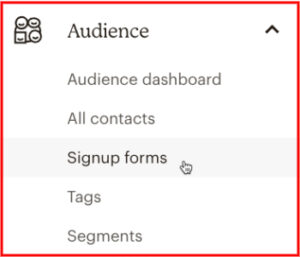
- On the MailChimp website, go to Audience > Signup forms
- Click "Select" in Form builder.
- It will immediately generate a signup form URL.

- Open the Signup form URL in a browser.
- Right-click to an open space and click Inspect.
- Get the "base address", the "u", and the "id".

base address = https://gmail.us21.list-manage.com/subscribe/post
u = 5440766156379558b78ce304d
id = 470af70371
(Note: This is a sample base address, u and, id. You will have different details for this.) - Know the name of each one of the form fields. (Example: The name of the field "Email" is MERGE0). Right-click on that "field" and click inspect.
Email = MERGE0 > MERGE0=
First Name = MERGE1 > MERGE1=
Last Name = MERGE2 > MERGE2=
(Note: This is a sample name of each field. The one in bold format will be added later) - Combine now all the details in this pattern, base address + ? + Field name + & + u=check details for the u+ & + id=check detail for the id.
Example: https://gmail.us21.list-manage.com/subscribe/post?MERGE0=&MERGE1=&u=5440766156379558b78ce304d&id=470af70371
Note: The sample above doesn't include the last name as a field. If you need to add a field just check step#7 and then add it just like what it shows in step#8 in this pattern. "& + MERGE2="
Example: https://gmail.us21.list-manage.com/subscribe/post?MERGE0=&MERGE1=&MERGE2=&u=5440766156379558b78ce304d&id=470af70371

Now that you have obtained a URL, you can set it up in your Geelus application.
Setting Up in Geelus
Follow these steps to set up the request in Geelus.
- Log in to your Geelus account and go to "Settings" from the left-hand side menu.
- Click on "Http request templates".
- Click on the "+" button to add a new Http request template.
- Enter a name for your template in the "Http request template name" field.
- Select "Customer" from the "Template type" dropdown menu.
- Select "POST" from the "Type" dropdown menu.
- Enter the Mailchimp API request URL, along with any necessary parameters, in the "Request URL + parameters" field.
Example: https://gmail.us21.list-manage.com/subscribe/post?MERGE0=&MERGE1=&MERGE2=&u=5440766156379558b78ce304d&id=470af70371 - Click on the "Check" button to save the template.
Once you've saved the Http request template, you should be able to use it to send POST requests to the specified URL with the parameters you've defined.
Add an Automation Action
Now that an HTTP request has been created, we will add an automated action.
Here are the steps to add an automation action to your HTTP request in Geelus:
- Log in to your Geelus account and go to “Settings” from the left-hand side menu.
- Click on “Actions”.
- Click on the “+” button to add a new automated action.
- Enter a name for your action in the “Action name” field.
- Under “Action type”, select “Http request” from the dropdown menu.
- Select the HTTP request template that you created from the “Http request template” dropdown menu.
Action name: enter the name
Action type: Send HTTP request (Desktop only)
Send HTTP requesting using: the template you created in the previous section
Trigger action: New contact/customer created - Click on the “Check” button to save the automation action.
Now, every time a new customer is created in Geelus, a new record with the customer’s information will be added in MailChimp as well.


