Welcome to the September 21, 2022 release of features. We hope you like the latest updates in this version, the highlights are as follows:
New release
New transaction:
Customer preferences:
Pinned fields:
- Customer Group can now be used on all templates (like print, text message, and all pages)
- Pin the Customer Group
Tools:
- Enforce Clock-in / Time sheet functionality
- Overnight work notifications
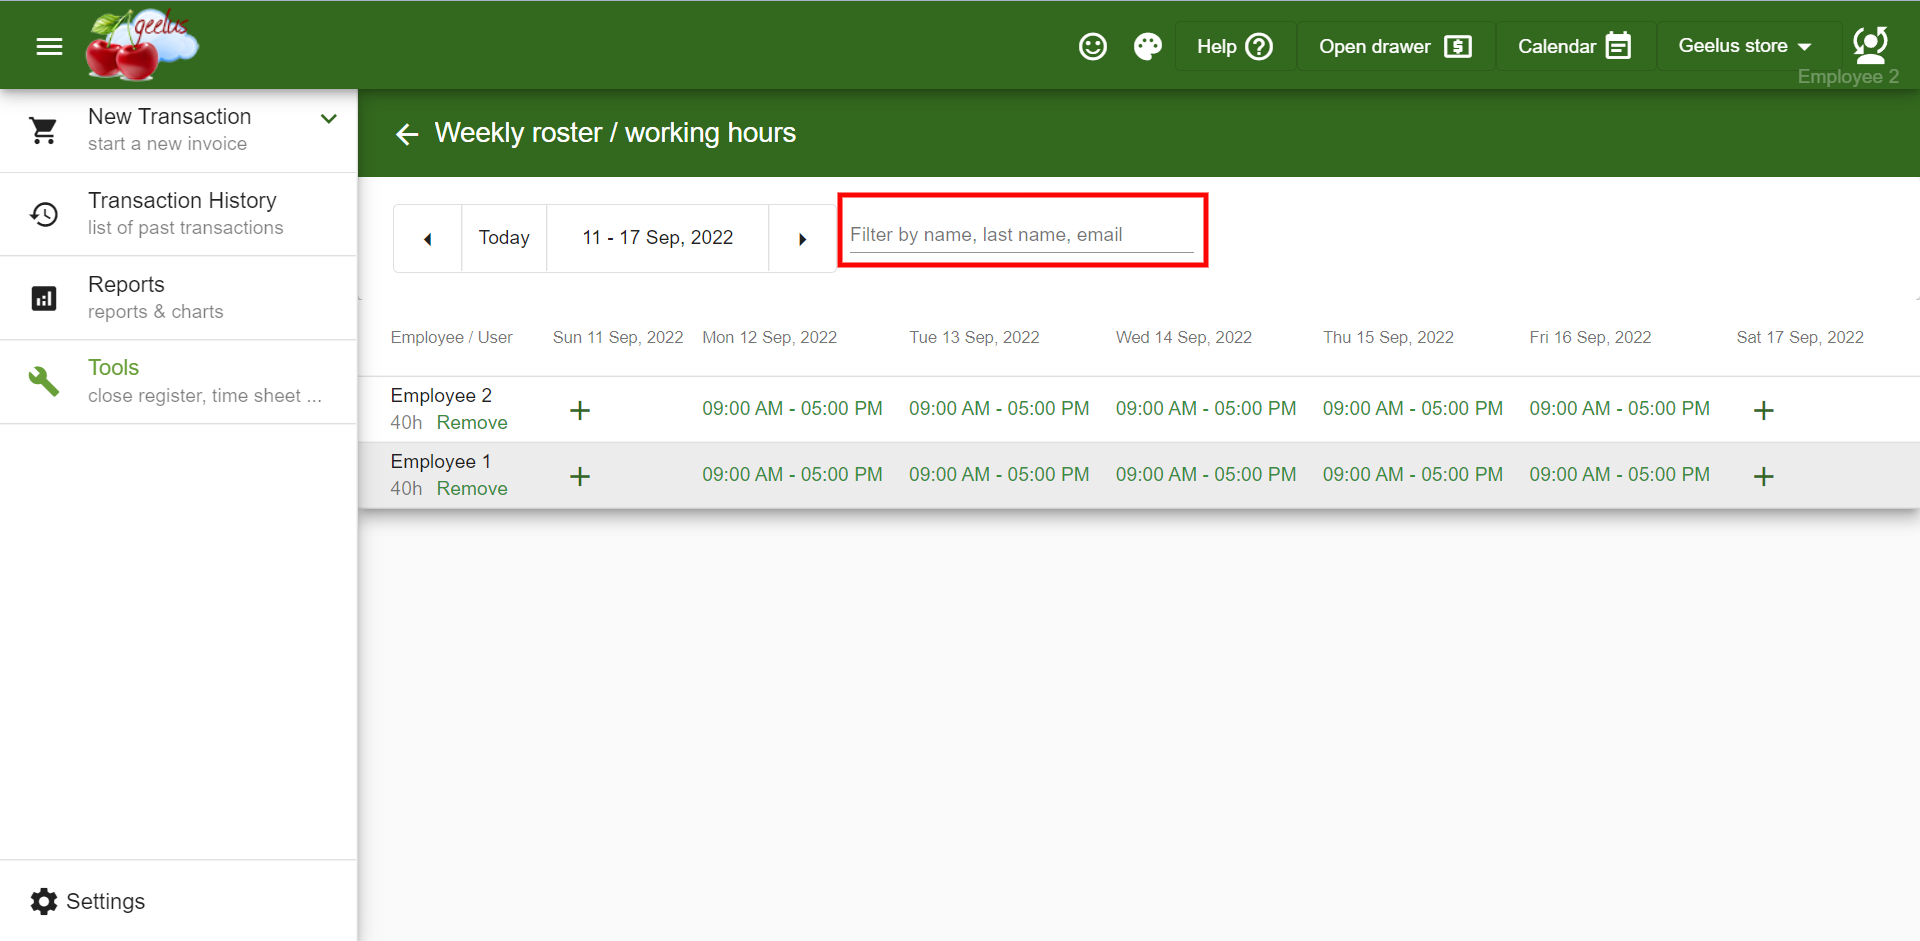
- Ability to search for a user on the Roster/Working hours page
Multi-store new features:
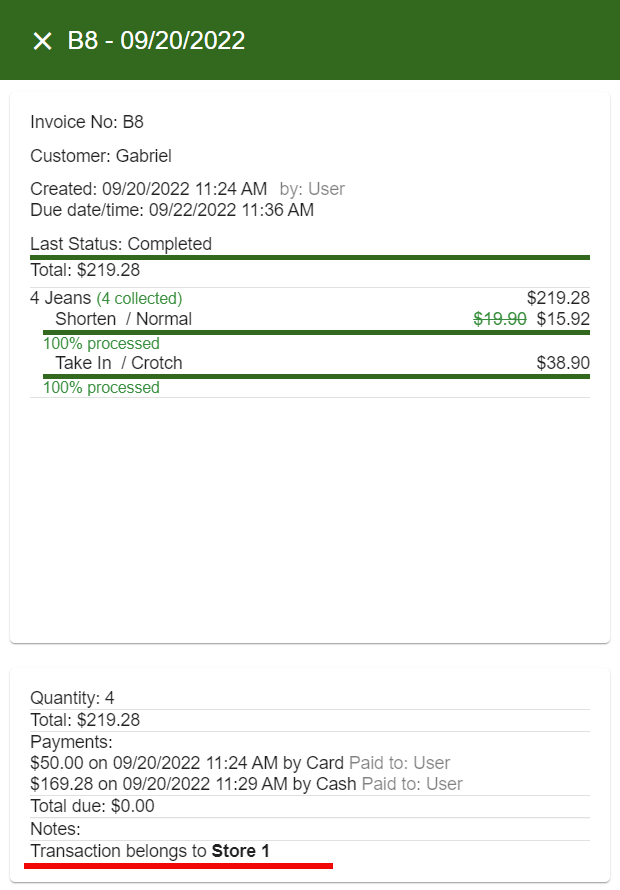
- Add a store prefix to store transactions
- Search for an order number across all stores
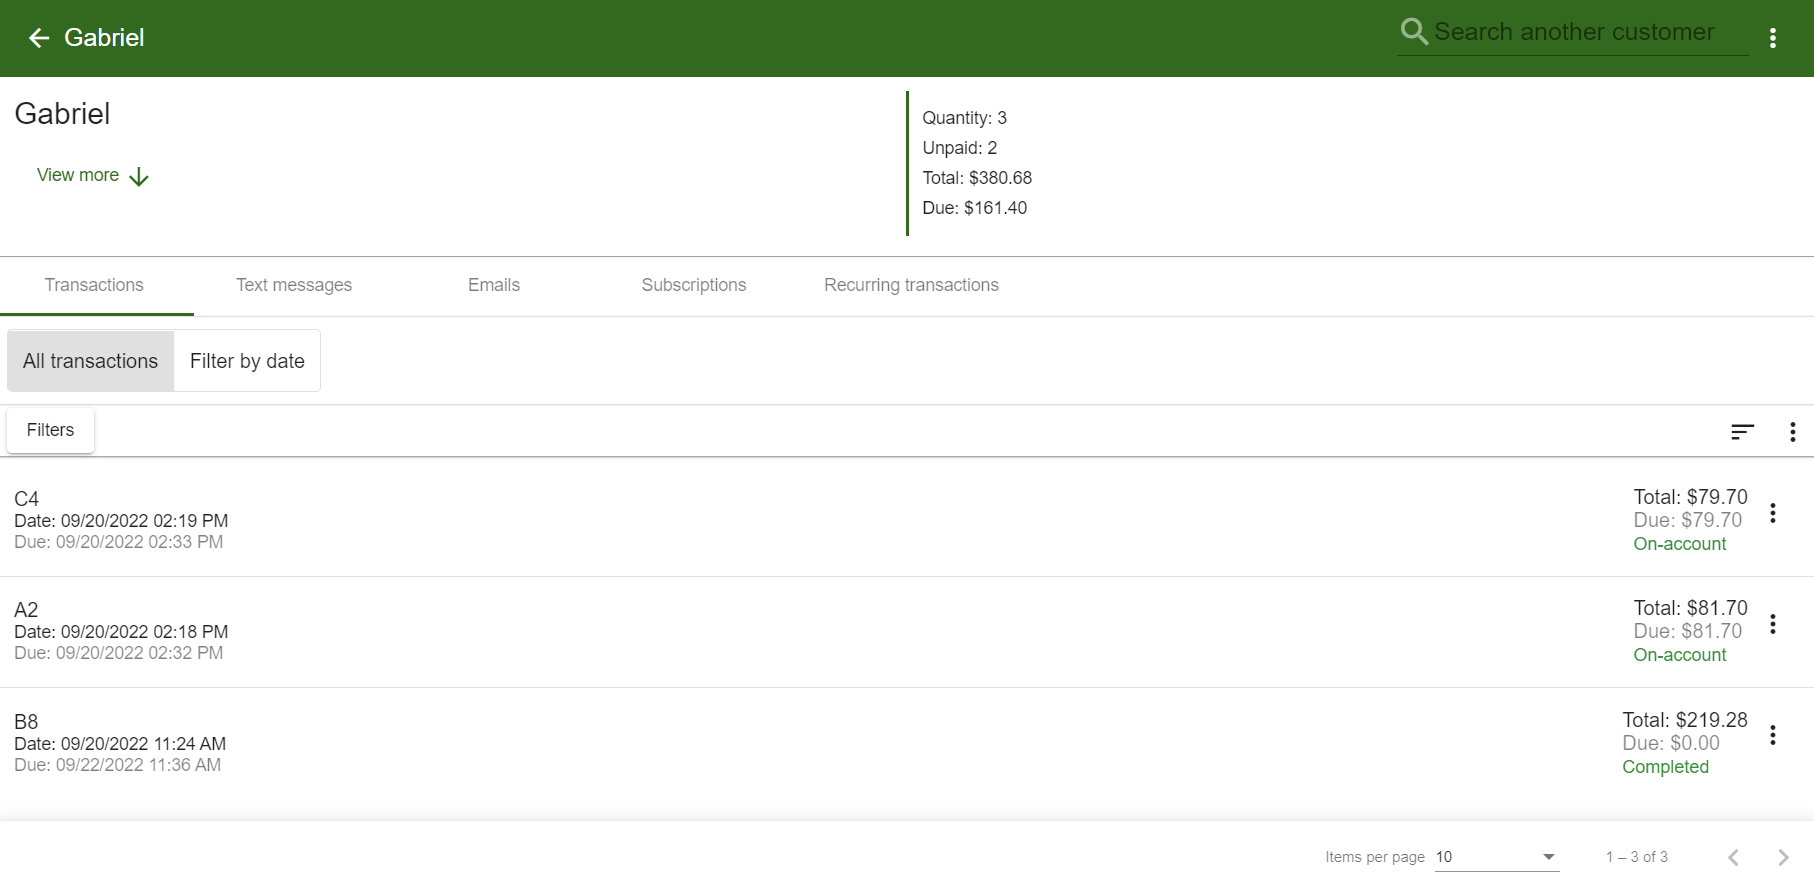
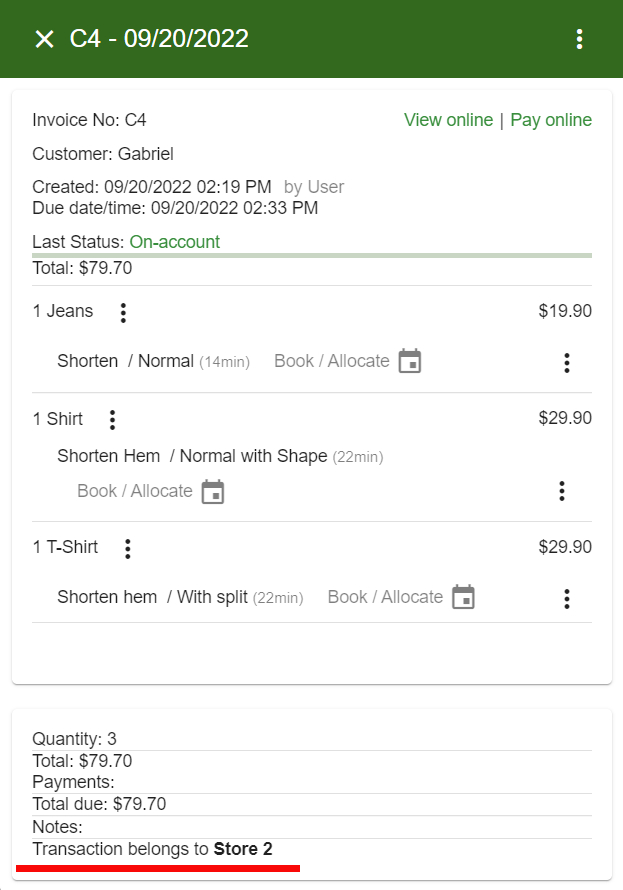
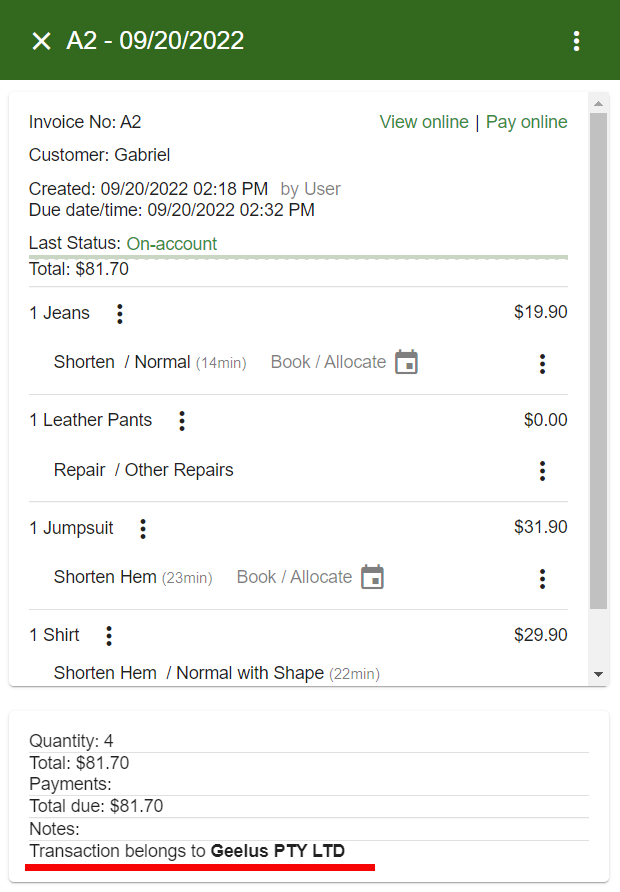
- See transactions from all stores when opening customer window
- Added transaction quantity to multi-store reporting
All new outsourcing features:
- Being able to outsource the order to another store when placing a new transaction
- Showing the Real-time calculation of job load for other stores
- Mark outsourced transactions done or collected on another store.
- Outsourcing functions from one store to another for pre-existing orders.
- Report of all outsourced transactions (from and to a store) under “Transaction history”.
- Sending notification to other stores when a transaction is outsourced or an outsourced transaction is marked ready.
- The functionality of returning an outsourced transaction back to the original store.
Calendar:
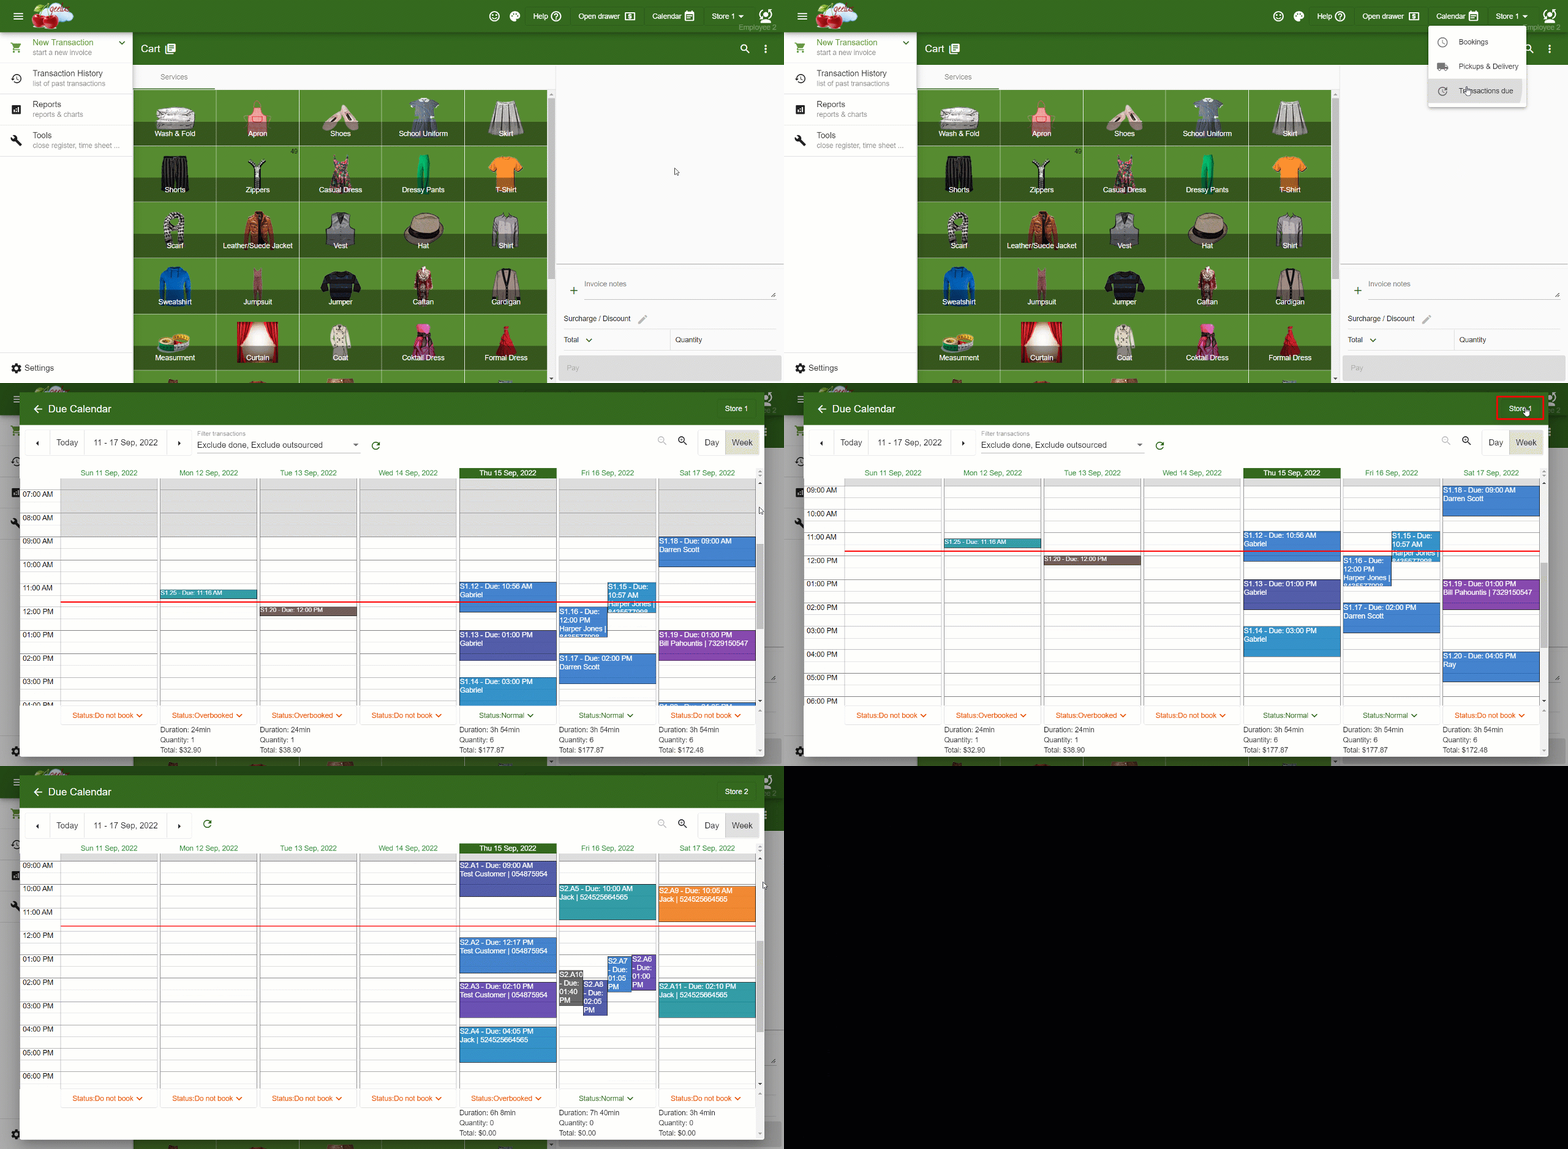
- Ability to see other store’s transactions due under the calendar
- Data display on all days
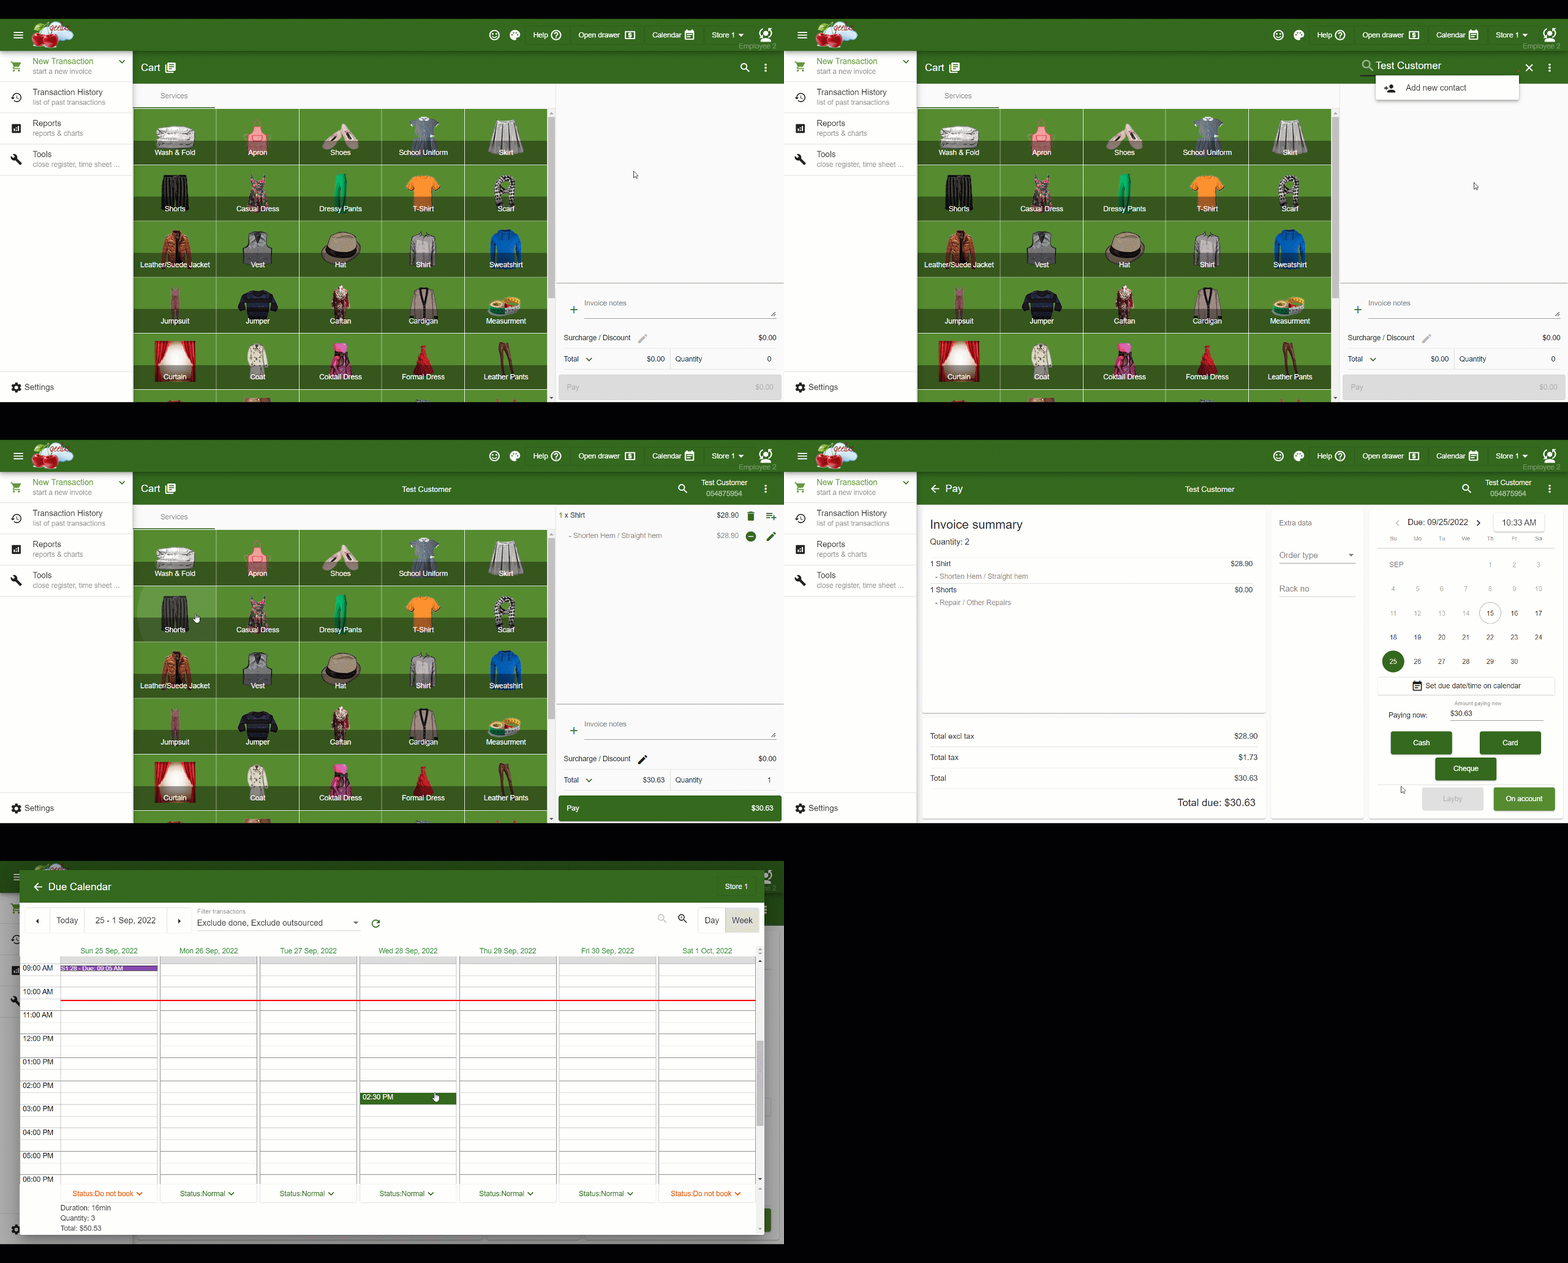
- Ability to set transactions due date and time right from the convenience of the calendar.
Extra fields:
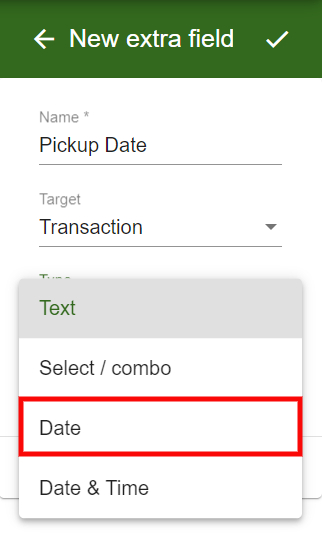
- New “Date” type for the extra field that shows you a calendar to select a date
- New “Date / Time” type, to select date and time
Items
New Improvements
- Updated store setup to allow editing stores much easier
- Update to “User setup” for better navigation and search
- Search by name, last name, and email on the user’s edit page
- Live chat from inside the app
- New Help layout to allow using the app while navigating the help pages
- Improved UI to allow setting the staff schedules for multiple stores all from one window
New Bug Fixes
- Downloading sample csv on desktop app doesn’t work
- Export and re-import fixed not to affect order of displaying variants
- Setup Wizard Tax does not allow percentage
Show Prices
Now you can show the item prices before selecting the item on new transaction page. This is very handy if you have multiple variants and not sure which one is the correct one to choose.


Please follow the guide below on how to manage the price show option.
- Navigate to “Settings > Items > Layouts”
- Check the box next to “Show item prices” to show prices, and uncheck the box to hide the prices.
- Click the “Save” button to make the changes
Show duration
Similar to showing the price, this will show you the duration that takes to do each job.


Please follow the guide below on how to manage the duration show option.
- Navigate to “Settings > Items > Layouts”
- Check the box next to “Show item duration” to show the duration, and uncheck the box to hide the duration.
- Click the “Save” button to make the changes
Enforce extra data
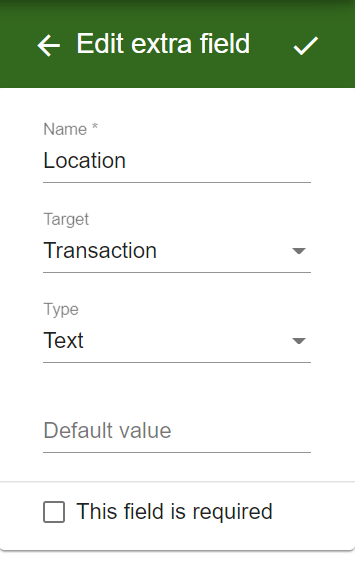
This feature will allow you to make the extra data a required field. To enable this feature:
- Navigate to Settings > Extra fields
- Click the extra fields name to edit it
- Check the box “This field is required” to enable it.
- Click the checkmark to save the changes.
Option to disallow changing the price manually
This feature will allow you to manage the manual price change through the edit button when placing or editing the transaction.
To enable this feature:
- Navigate to Settings > Roles
- Click the pen icon next to the role you would like to enable this option
- Check the box for “Can update price when placing or editing a transaction”
- Click the checkmark to save changes.
Being able to Enable/disable Tax or select a different type of tax(es) for a customer
This feature will allow you to enable/disable Tax(es) or select a different type of tax(es) for a customer. When you disable the Tax(es), the customer will become a tax-exempt customer.
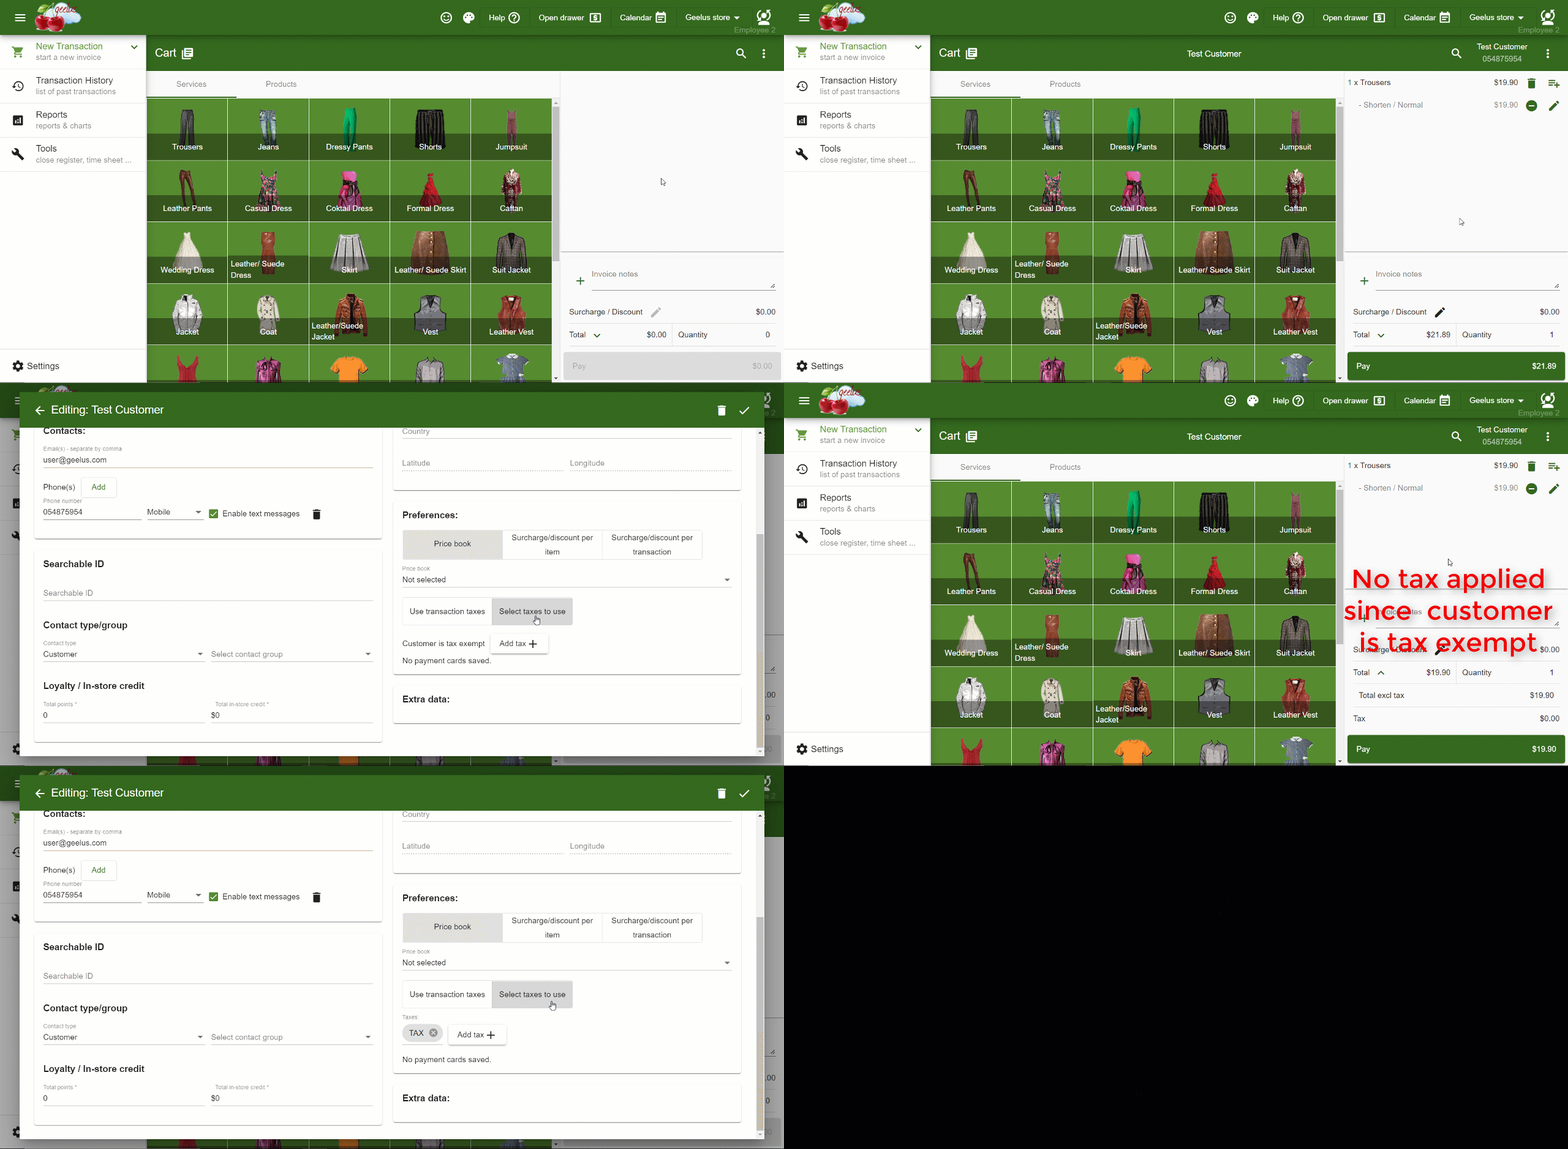
Please follow the guide below on how to enable/disable or select different Tax(es) for a customer.
1. Disable Tax(es)
- Navigate to the New Transaction page
- Click the Search button on the right side
- Enter the contact’s name
- Click the contact’s name
- A dropdown box will open
- Choose Edit Contact’s Name
- The edit page for the contact will appear
- Scroll down and click “Select taxes to use”
- Don’t select any taxes and click the checkmark to save
- The customer will become tax-exempt when you don’t select any taxes
2. Enable Tax(es)
- Navigate to the New Transaction page
- Click the Search button on the right side
- Enter the contact’s name
- Click the contact’s name
- A dropdown box will open
- Choose Edit Contact’s Name
- The edit page for the contact will appear
- Scroll down and click “Use transaction taxes”
- Click the checkmark to save changes
3. Selecting different Tax(es) for a customer
- Navigate to the New Transaction page
- Click the Search button on the right side
- Enter the contact’s name
- Click the contact’s name
- A dropdown box will open
- Choose Edit Contact’s Name
- The edit page for the contact will appear
- Scroll down and click “Select taxes to use”
- Click plus button and select the tax you wish to use
- Click the checkmark to save changes
Pin the Customer Group
You can now pin the Customer Group on a transaction or the customer’s profile. This means the customer group can be displayed under transaction history without the need to open the transaction and also it can be displayed when you add the customer on the new transaction page.
Please follow the guide below on how to pin the group
- Navigate to Settings > Company > Pinned fields
- Click the plus button to add a new pinned field
- Select the type “Contact”/”Transaction”
- Search for the “Group display name” option and select it
- Click the checkmark to save changes
Enforce Clock-in / Time sheet functionality
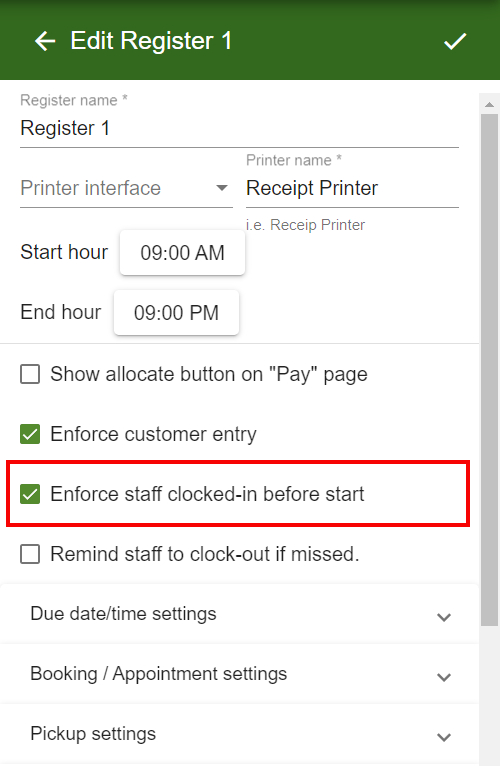
Geelus can now show a reminder to clock in at the beginning of the shift. This means that when someone logs into their user account at the beginning of their shift, Geelus will show a notification to clock in to avoid missing the clocking in.

Please follow the guide below on how to enable enforce staff clock-in
- Navigate Settings > Register
- Click the Register name or pen icon to open register settings
- Check the box for “Enforce staff clocked-in before start”
- Click the checkmark to save changes
Overnight work notifications
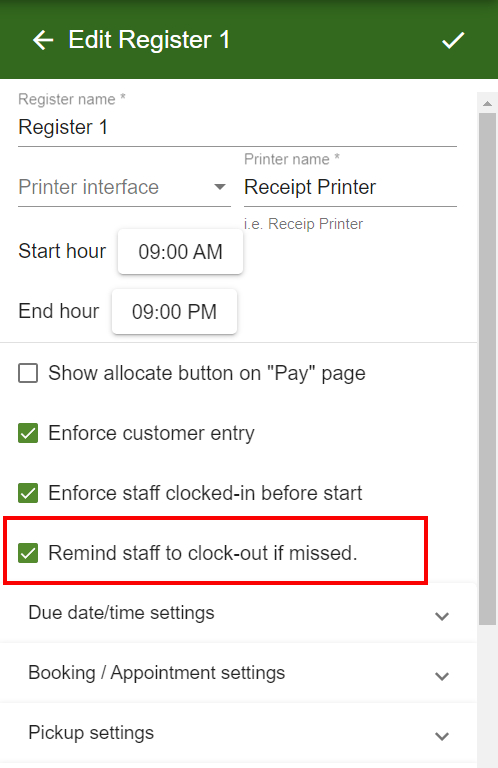
Geelus can now show a reminder and allows manual clock-in time entry in case of missed clock-in for the previous day. If an employee forgets to clock out, they will see a reminder pop-up for them to be able to clock out manually, on their next shift.

Please follow the guide below on how to enable this feature
- Navigate Settings > Register
- Click the Register name or pen icon to open register settings
- Check the box for “Remind staff to clock-out if missed”
- Click the checkmark to save changes
When a staff or user logs an overnight clock-in, Geelus sends a notification to all users who have this feature enabled.
Ability to search for a user on the Roster/Working hours page
You can now Search a user by name, last name, or email on the Employee working hours/schedule window
Add a store prefix to store transactions
You can now add a prefix to all transactions of a store. Please follow the guide below on how to do it.
- Navigate to Settings > Stores
- Select the store you want to add a prefix
- Enter your prefix on the “Transaction no prefix” line
- Click the checkmark to save changes
Search for an order number across all stores
This feature will allow you to search for orders across all stores. For example, if an order was placed on Store A, you will be able to search for this order on Store B. Please note that this works only if you have multiple stores under the same account.
See transactions from all stores when opening customer window
You can now see customers’ transactions from all stores when opening the customer window
Here is how to navigate to the customer window
- Navigate to the New Transaction page
- Click the search icon and search for a customer
- Click on the customer’s name
- Select the “View Details” option
- You are now on the customer window
You will be able to see all transactions for this customer from all other stores.
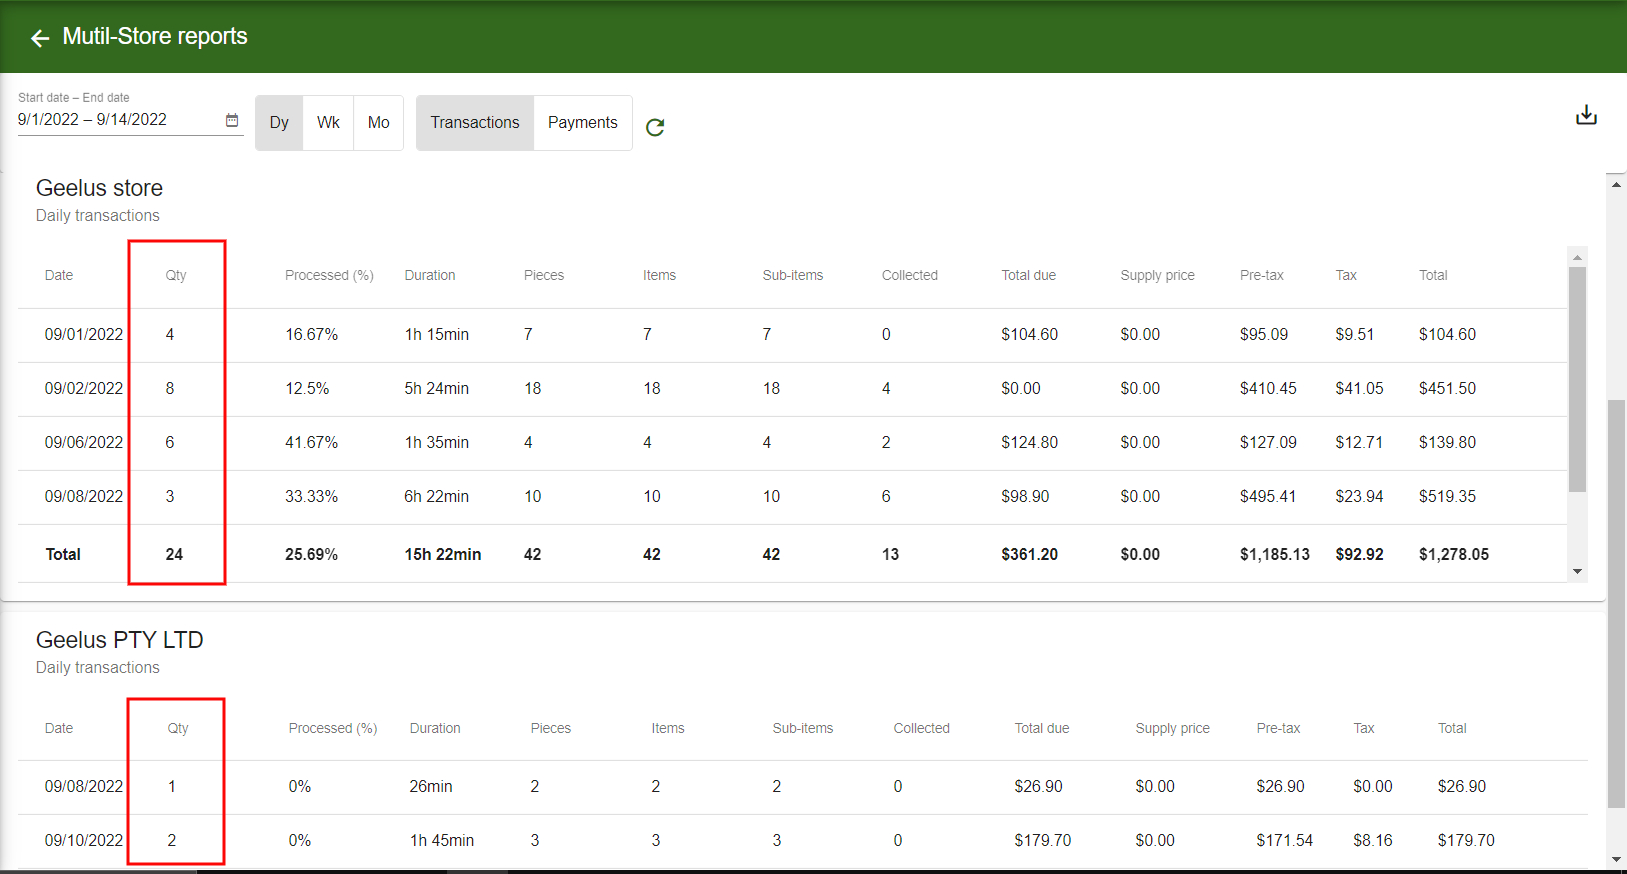
Added transaction quantity to multi-store reporting
A newly added feature, being able to see the transaction quantity on the Multi-store reports.
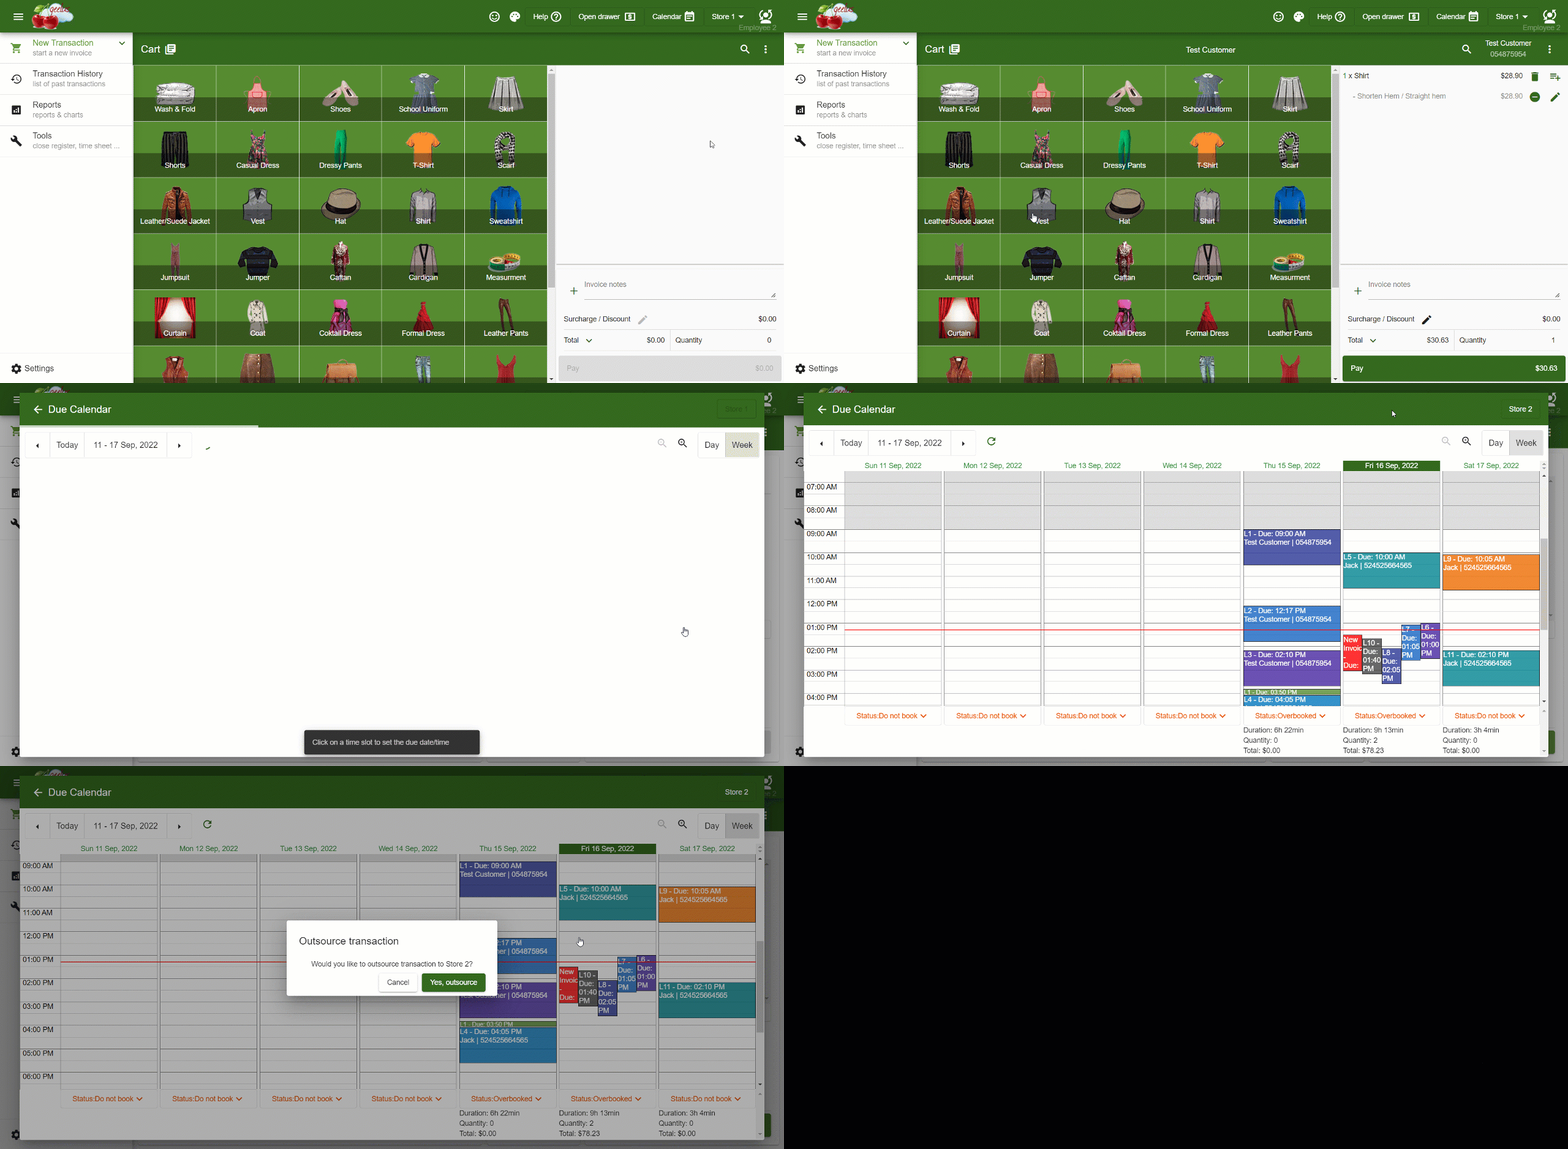
Being able to outsource the order to another store when placing a new transaction
You can now outsource transactions from one store to another store with this new Outsourcing feature. To outsource the order, simply
- Create a normal transaction.
- Once you get to the due date selection page, click the “Set due date/time on the calendar” button
- Then, switch to the store you want to outsource by clicking the store switch button at the top right corner
- Simply pick an empty slot to outsource
- Proceed with the transaction
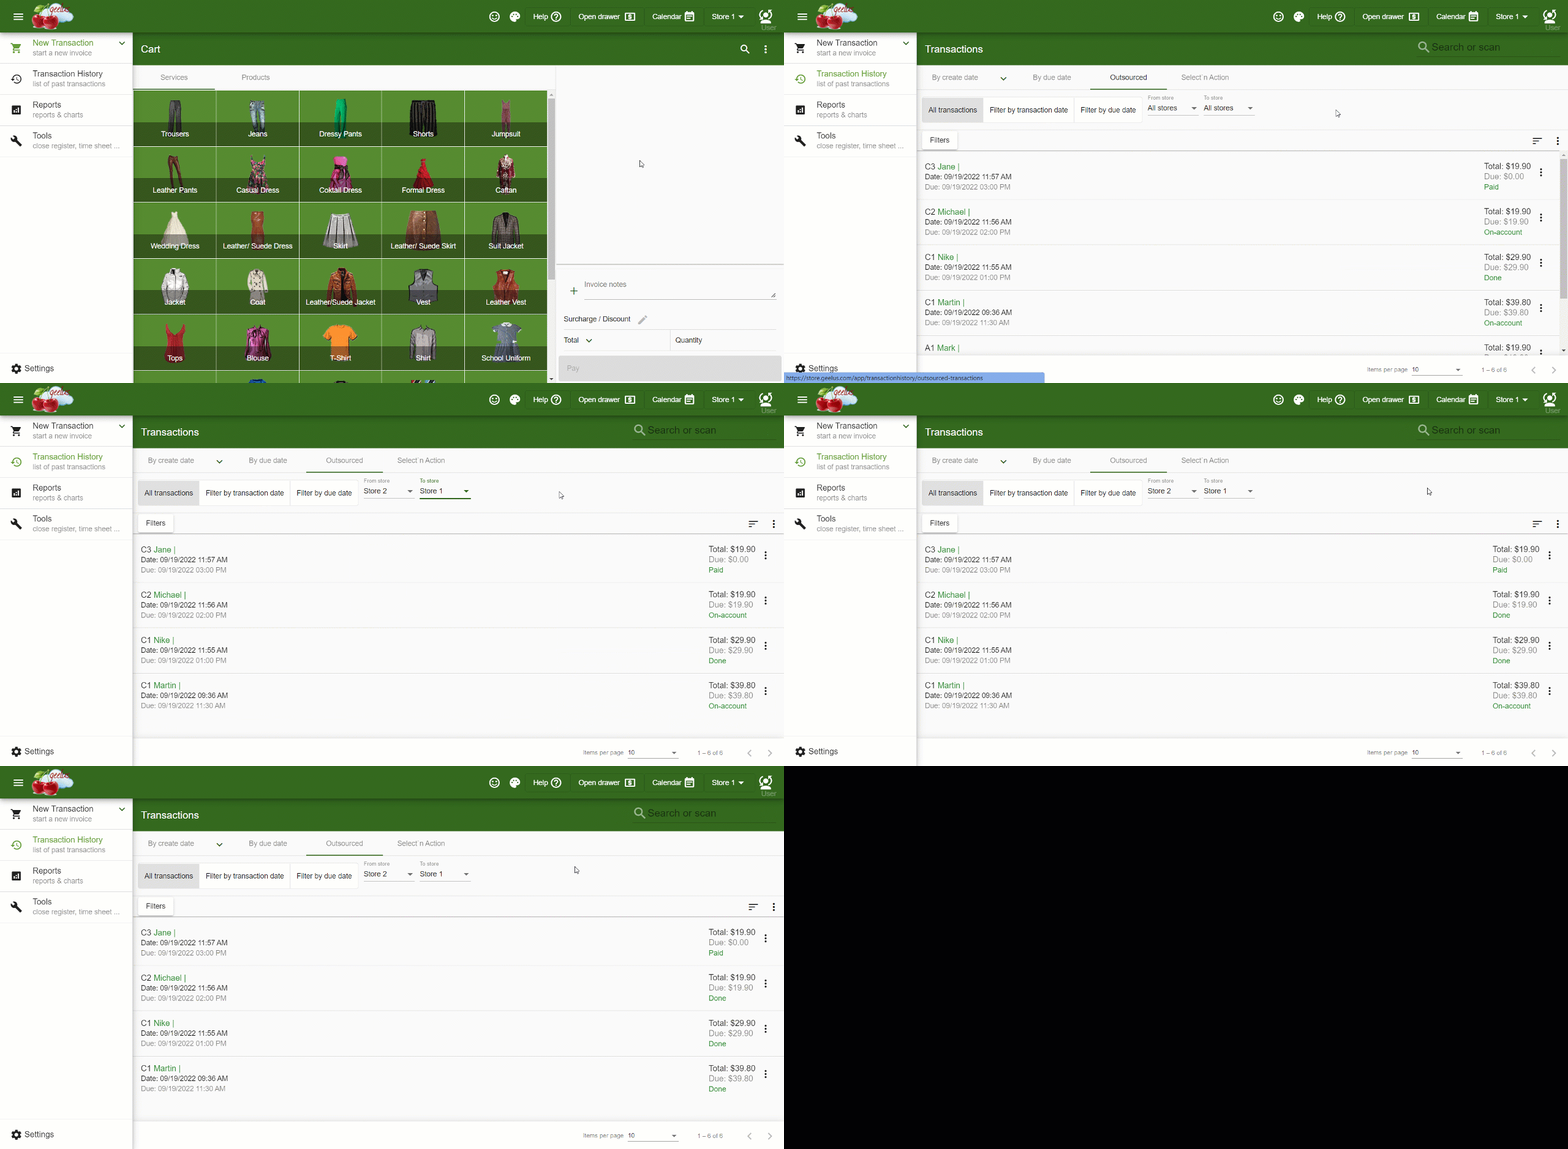
Report of all outsourced transactions (from and to a store) under “Transaction history”
You can easily access the report of all outsourced transactions (from and to a store) under “Transaction history”.

Mark outsourced transactions done or collected on another store
This feature allows you to mark outsourced transactions done or collected in another store.
Outsourcing functions from one store to another for pre-existing orders
If you have existing orders that you wish to outsource or if you forget to outsource the order, you can simply outsource them under “Transaction history”. Please follow the guide below on how to do it.
- Navigate to “Transaction history”
- Locate and open the order that you want to outsource
- Click the 3 dots on the top right corner
- Click “Outsource to” and select the store
- The due calendar will show up on the next stage for the selected store
- Choose an empty slot and click “Yes, outsource”

Sending notification to other stores when a transaction is outsourced or an outsourced transaction is marked ready
Now you can send a notification to other stores when a transaction is outsourced or an outsourced transaction is marked done.
To set up this feature,
- Email or SMS templates need to be created. These templates will be used in automated actions. Please refer to these links on how to create an Email or SMS templates
- Automated actions need to be created for sending Email/SMS reminders when the order is outsourced and when the outsourced order is marked done. Please refer to this link on how to create automated actions.
Note: Outsourcing status needs to be selected when creating the automated action to work for these notifications to work
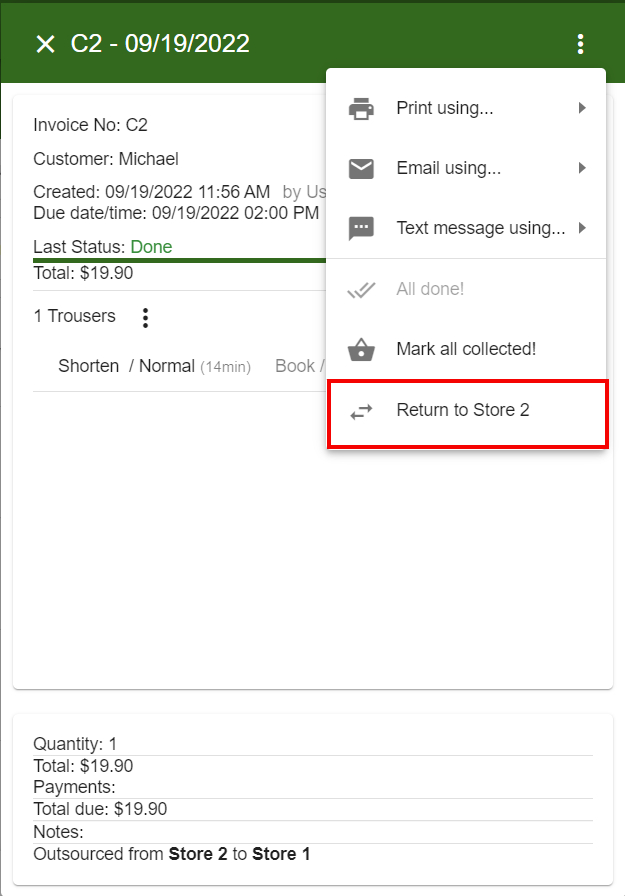
The functionality of returning an outsourced transaction back to the original store
Typically at the end of the outsourcing process, the outsourced transaction will be returned back to the original store.
Please follow the guide below on how to do it.
- Navigate to “Transaction history”
- Locate and open the outsourced order that you want to return to the original store
- Click the 3 dots on the top right corner
- Click “Return to (Store name)”
- Transaction will be returned to the original store
Ability to see other store’s transactions due under the calendar
You can now see other stores’ transactions due under the calendar without having to switch stores.
Ability to set transactions due date and time right from the convenience of the calendar
This feature will allow you to set the transaction due date and time on the calendar when you place the order.
New “Date” type for the extra field that shows you a calendar to select a date
This feature will let you add a new extra field in a calendar format where you can select a date. Please follow the guide below on how to add it.
- Navigate to Settings > Extra fields
- Click the plus on the top right corner to add a new extra field
- Enter the name, select the target, and under type select the “Date” option
- Click the checkmark to save.
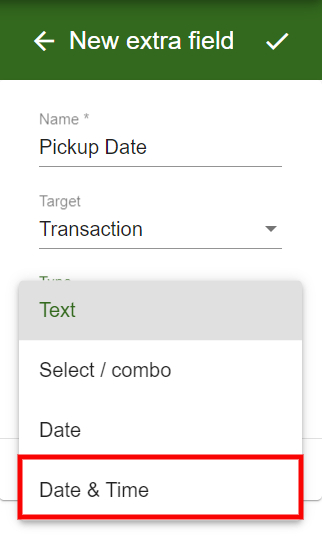
New “Date / Time” type, to select date and time
This feature will let you add a new extra field in a calendar format where you can select a date and time. Please follow the guide below on how to add it.
- Navigate to Settings > Extra fields
- Click the plus on the top right corner to add a new extra field
- Enter the name, select the target, and under type select the “Date & Time” option
- Click the checkmark to save.
Duplicating items
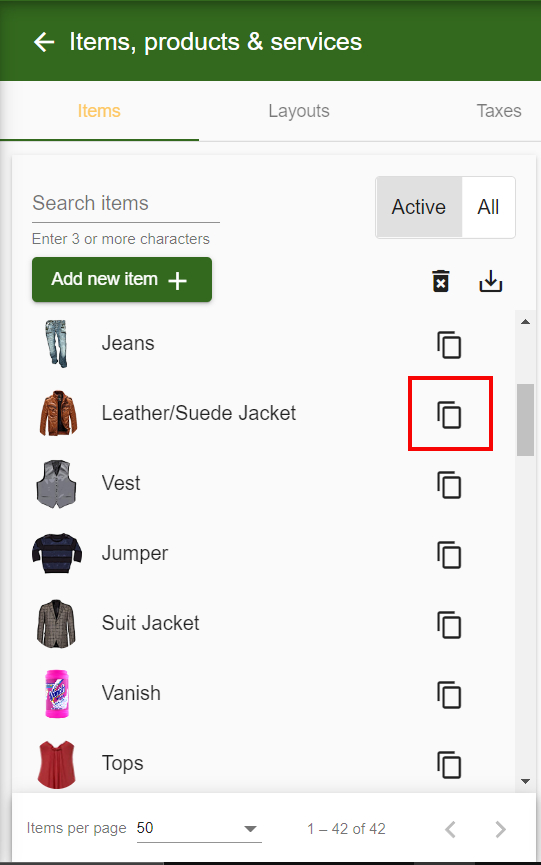
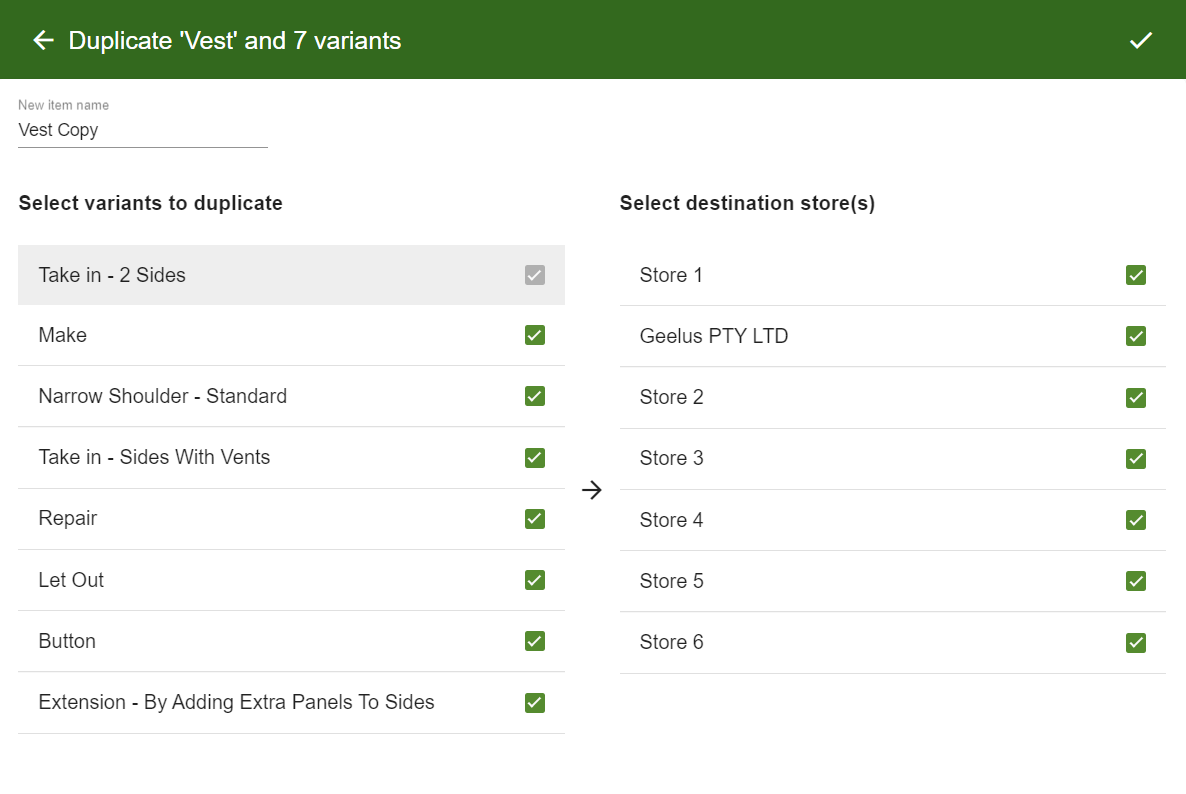
Now you can duplicate any item with all its variants on selected or on all stores. To duplicate an item,
- Navigate to Settings > Items
- Locate the item that you want to duplicate
- Click the duplicate button next to the item
- Enter the new item’s name, select the variants to be duplicated, and destination stores
- Click the checkmark to duplicate
Camera as a barcode scanner (Web version only)
You can now use your phone or tablet’s Camera as a Barcode scanner. Extremely handy if your staff at the back of the store is using a phone to mark the job done.
Note: This option only works on the web version of the app on phones and tablets.
To use this feature,
- Navigate to transaction history on your tablet or phone
- Click the small barcode scanner icon next to the search or scan section
- Allow access to your camera
- Simply scan the barcode using your device’s camera to mark jobs done or search for transactions

